
 |
| How to Remove Car Scratch at Home – Ultimate DIY Guide |
How to Remove Car Scratch at Home - Ultimate DIY Guide
How to remove car scratch at home? Discover proven DIY home fixes, a step-by-step guide, and expert tips to restore your car’s finish!
Summary
Car scratches are more than just a minor cosmetic flaw: left untreated, they can threaten your car's resale value, invite rust, and diminish pride of ownership. But the good news is, you don’t have to be a professional—or spend a fortune—to restore that showroom shine. This comprehensive, step-by-step ultimate DIY guide reveals how to remove car scratch at home using proven, safe, and cost-effective techniques. You’ll learn everything from decoding scratch depth, prepping your car’s surface, household and professional product fixes (think: toothpaste, baking soda, WD-40, polishing compound, scratch removal kits), to expert-level finishing, post-repair protection, and when to call a pro. Whether you drive a family sedan, a luxury SUV, or a vintage ride, you’ll get practical advice, safety warnings, expert insights, and answers to the most common scratch-repair questions—all backed by the latest automotive standards and best practices.
Introduction
If you’ve ever discovered a new scratch on your car, you know the sinking feeling it brings. Scratches can result from wayward shopping carts, tree branches, dogs, or simple accidents. While a trip to the auto body shop can be costly, the reality is—with the right approach—a large proportion of car scratches can be effectively, safely, and affordably repaired right in your driveway.
This article will serve as your ultimate DIY guide for how to remove car scratch at home, equipping you with the latest evidence-based methods, practical step-by-step instructions, and essential aftercare knowledge. We’ll help you assess scratch depth, choose between DIY and professional solutions, use household items like toothpaste and baking soda, apply rubbing and polishing compounds correctly, and master the finishing touches (polish, wax, and sealant) that protect your repair. Whether you're aiming to save on scratch car repair costs (TurboKar) or simply want to enjoy a flawless finish, you’ll find all you need to tackle scratches with confidence.
Understanding Car Scratches
Types and Depths of Car Scratches
Not all scratches are created equal—and the key to successful DIY repair is the ability to accurately identify the type and severity of damage. Vehicle paint typically consists of several distinct layers: the clear coat (the top, transparent shield), followed by the color base coat, primer, and finally the bare metal panel.
Real-world test: Does toothpaste actually work for car scratch removal?
| Type of Scratch | Description | Repair Difficulty | DIY Suitability |
|---|---|---|---|
| Clear Coat Scratch | Affects only the outermost, clear protective layer | Easy | Excellent |
| Base Coat (Paint) Scratch | Goes into the color paint, but not through to primer | Moderate | Good — with more steps |
| Primer Scratch | Penetrates to primer (may expose dull/grey surface) | Hard | Sometimes, but pro advised |
| Bare Metal Scratch | Exposes bare metal (risk of rust) | Hardest | Pro advised |
For most car owners, clear coat and base coat scratches are the most common, and best suited for DIY fixes.
Assessment tip: Run your fingernail gently across the scratch. If your nail snags or “catches,” it’s likely deeper than the clear coat and may require fuller restoration.
Identifying Scratch Type at Home
Clear Coat Scratch: Looks whitish or dull, only visible from some angles, not deeply felt.
Base Coat Scratch: Appears distinctly colored—matching your car’s paint.
Primer/Bare Metal Scratch: Dull grey or silver for primer; shiny, reflective metal for bare metal; these require urgent attention to avoid rust.
Why depth matters: Superficial scratches don’t threaten structural integrity or promote rust, while deep scratches that cut through to primer or metal can result in rapid corrosion. For more reading on types and depth levels, see The Vehicle Lab.
When to Use DIY Methods
Light scratches (clear coat, shallow base coat): DIY methods are highly effective.
Deep scratches (primer, bare metal): May need touch-up paint, filler, or professional attention.
For a comprehensive cost breakdown of professional repairs, see our internal cost guide at TurboKar.
Prepping the Area: The Foundation of a Perfect Repair
Why Preparation Matters
Proper surface preparation ensures that all the repair steps (from buffing to sealants) work as intended—creating a cleaner, smoother, longer-lasting finish. Good prep is essential.
Materials Checklist
Automotive or gentle pH-neutral soap
Microfiber towels (do not use rough or dirty rags)
Optional: automotive clay bar (for stubborn contaminants)
1500-3000 grit wet/dry sandpaper (for deep scratches only)
Rubbing alcohol or isopropyl alcohol for final cleaning
Step-by-Step Prep
Clean the Area:
Use car shampoo and water to remove dirt, oils, and wax. Rinse and dry thoroughly.
Inspect the Scratch:
View at different angles and in good light. Run your nail across the area—assess depth.
Remove Surface Debris:
For sticky residue or tough contamination, use a clay bar (optional).
Mask Off Surrounding Area:
Use painter’s or automotive masking tape if you’re sanding or using touch-up paint, to avoid accidental damage to good paint.
Final Pre-Repair Wipe Down:
Clean again with isopropyl alcohol to remove any traces of wax, grease, or compounded dust.
Pro tip: Skipping proper prep is the number one cause of unsatisfactory or temporary results.
DIY Car Scratch Removal Methods
You don’t always need specialized products—many household items and affordable automotive compounds can be extremely effective, especially for surface scratches. Below are the most popular and evidence-backed methods, sorted by scratch severity.
The Toothpaste Car Scratch Fix
Best for: Light clear coat scratches/swirl marks
How it works: Toothpaste contains mild abrasives that function like a very gentle polish.
How to apply:
- Clean the area.
- Apply a dab of plain white, non-gel toothpaste on a soft, damp microfiber cloth.
- Rub gently in small, circular motions for 30–60 seconds.
- Wipe clean, assess, and repeat if necessary (up to 3 times).
- Rinse, dry, and optionally seal with wax.
Results: Often removes or dramatically reduces fine scratches; will not work for deep or sharp scratches. Cautions: Do not use colored or “crystal” toothpastes; avoid over-rubbing (can cause dullness); retest on a hidden area first. (See a similar DIY reference: David's Guide.)
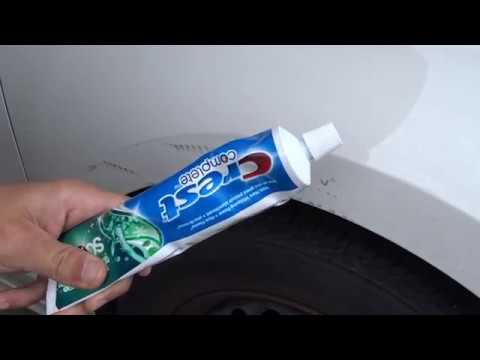
Watch how toothpaste can remove light car scratches in minutes—perfect for beginners!
Baking Soda Scratch Removal
Best for: Light to moderate clear coat scratches, scuffs (not gouges)
Why it works: Baking soda is a gentle abrasive, similar to mild toothpaste.
Steps:
- Mix baking soda and water into a thick paste (usually 2:1 ratio).
- Apply to the scratch with a soft cloth.
- Gently rub in a circular motion for 1–2 minutes.
- Wipe away residue with a clean, damp towel.
- Rinse and inspect; repeat as needed.
Results: Safe and effective for many clear coat blemishes; minimal risk on most automotive paints. (Related guide: CarsBibles.)
WD-40 for Car Scratches
Best for: Concealing shallow scratches/scuff marks temporarily
How it works: WD-40 can fill very fine scratches or scuffs, making them less visible.
Steps:
- Spray a small amount of WD-40 onto a clean microfiber cloth.
- Wipe gently over the scratch.
- Buff lightly; avoid excess product.
Results: Can disguise scratches and enhance gloss, but the effect is often temporary—it’s a quick cosmetic fix, not a solution. Warning: Do not use WD-40 on areas that will be painted soon or need a proper permanent finish; thoroughly wash off before any further touch-ups.
Scratch Removal Kits and Polishing Compounds
What They Are:
Commercial automotive scratch remover products usually combine a mildly abrasive polishing compound with conditioners and a buffing pad. Specialized kits can address both clear coat and shallow base coat scratches.
How to Use:
- Clean and prep as above.
- Apply compound: Place a small amount onto the provided pad or a microfiber cloth.
- Buff: Use small, circular motions, applying gentle and consistent pressure, over the scratch.
- Wipe clean: Remove excess compound with a separate clean towel.
- Assess: Repeat 1–2 more times if necessary.
- Protect: Follow up with a high-quality wax or sealant to restore gloss and shield the area.
Results and Effectiveness: Clear coat scratches may disappear completely with proper technique. Base coat scratches can be reduced, but may need color touch-up for perfect blending. Some kits are specifically formulated for certain paint types (check label).
| Method | Best For... | Cost | Finish Quality | Long-Term Durability |
|---|---|---|---|---|
| Toothpaste | Light scuffs, clear coat | $0–$2 | Good, not perfect | Temporary, needs wax |
| Baking Soda | Scuffs, oxidation | $0–$1 | Good | Temporary, needs wax |
| WD-40 | Hiding minor marks | $1–$3 | Only cosmetic | Temporary |
| Scratch remover kit | Surface/borderline base | $10–$50 | Professional look | High, esp. w/sealant |
| Rubbing Compound | Moderate scratches | $6–$20 | Excellent | High, with aftercare |
Analysis: While household fixes are affordable and handy, commercial kits offer longer-lasting, more professional results—especially for light to moderate scratches. Protect all repairs with wax for extra longevity.
Using Rubbing Compound for Car Scratches
Rubbing compound is essentially a finely milled “liquid sandpaper.” It removes a microscopically thin layer of the top clear coat to blend the scratch with the surrounding area.
Steps:
- Clean and prep area.
- Apply a small amount of compound to a clean microfiber cloth or foam applicator.
- Rub gently in circular motions across the scratch and a few inches beyond, for about 30 seconds.
- Wipe residue with a clean, damp towel and assess.
- Repeat as needed, but avoid overdoing it (do not rub aggressively).
- Follow with polish for shine and wax for protection.
Warnings: Too much pressure or repeated use can thin the clear coat. Always start with a less abrasive product if possible. For a how-to overview, see wikiHow.
Nail Polish and Touch-Up Paint
For scratches that expose the base coat, primer, or metal, you’ll need to fill in the color.
For very small nicks/chips, clear nail polish can be a temporary filler after cleaning; select polish as close as possible to your car’s color.
For scratches larger than a thread, use touch-up car paint (matched to your vehicle’s paint code)—applied with a fine brush or applicator.
Application:
- Prep and sand as needed.
- Apply thin layers, letting each dry per instructions.
- Finish with a matching clear coat.
- Smooth and blend with light rubbing compound/polish if needed, then wax.
For more guidance on touch-up paint, see The CarBuzz.
Quick Reference Table: DIY Car Scratch Removal Methods
| Method | Effectiveness | Best For | Estimated Cost | Finish |
|---|---|---|---|---|
| Toothpaste | Good for clear coat | Superficial/light scratches | $0–$2 | Temporary if unwaxed |
| Baking Soda | Good | Scuffs, swirl marks | $0–$1 | Temporary if unwaxed |
| WD-40 | Cosmetic only (temporary) | Very light scuffs | $1–$3 | Low/temporary |
| DIY Compound Kit | Excellent | Light-moderate scratches | $10–$50 | High, with polish |
| Touch-up Paint | Essential for color loss | Paint/base coat scratches | $10–$40 | High, color match |
| Professional Repair | Best for deep damage | Primer/metal scratches | $150–$1000+ | Flawless/durable |
Sanding and Wet Sand Technique (For Deeper Scratches)
For deeper gouges (but not fully through to metal), wet sanding can level the area and prepare it for touch-up paint.
Use 1500–3000 grit wet/dry sandpaper (soak before use). Gently sand the scratch along its length, keeping the sandpaper and area well lubricated with water. Wipe off and assess: the area should feel and look smoother, though dull. Continue with rubbing compound, polish, and wax as described above.
Warning: Only attempt this if you are comfortable and have practiced on inconspicuous areas; improper sanding can worsen the damage or “burn through” the paint. For practical how-tos, see Paint Loving.
Finishing and Protection: Polish, Wax, and Sealant
DIY scratch removal is only half the battle—finishing and protecting the repair is crucial for longevity and appearance.
Why Polish, Wax, and Seal?
- Polish restores shine and levels out micro-abrasions.
- Wax (carnauba or synthetic) seals the repaired area, repels dirt, and boosts gloss.
- Sealant (such as ceramic or synthetic polymer) provides a durable, hydrophobic shield. Some options last months or even up to a year.
Finishing Steps:
- Apply a polish with a clean pad, following the product’s instructions.
- Buff with a microfiber cloth until the area glistens uniformly.
- Add a layer of wax or sealant for enhanced protection.
| Product | Type | Ease of Use | Durability | Notes |
|---|---|---|---|---|
| Meguiar’s Ultimate Compound | Rubbing comp. | Moderate | Moderate | Good for clear coat blends |
| Turtle Wax ICE Seal N Shine | Spray sealant | Very easy | High (months) | Use after all repairs |
| Carnauba Wax (any major brand) | Natural wax | Easy | 3–6 weeks | Warm glow, easy re-application |
| Clear coat touch-up (OEM) | Paint/Sealant | Moderate | High | Use for deep repairs/touch-ups |
When to Call a Professional
Not every scratch is a candidate for a quick home fix. Professional repair is strongly recommended when:
- The scratch exposes bare metal or possibly aluminum (risk of rust/corrosion)
- There are multiple deep, long scratches or key marks
- The damage is spreading, bubbling, or accumulating rust
- You drive a new, leased, or high-value vehicle where DIY mistakes may reduce value
- The scratches are located in tricky areas (panel edges, curves, or textured finishes)
Professionals offer OEM color-matching for flawless blending, proper sanding, priming, base and clear coat layering, and warranted repairs with superior, long-term durability. Get a quote or compare options via reputable sources such as The AA.
Practical Insights and Real-Life Examples
Expert Opinion
Chad Zani, an auto detailing expert, advises: “Stick to gentle abrasives for minor scratches, and always finish with polish and wax—even small repairs need protection. If your fingernail catches in the scratch, touch-up paint or professional help is safest.” (See more similar guidance at CarTreatments.)
Common DIYer mistakes (and how to avoid them):
- Using dirty rags or towels (causes new scratches!)
- Rushing or skipping pre-cleaning steps
- Applying too much pressure with abrasive compounds
- Skipping aftercare (leaves repairs exposed to the elements)
Real-Life Example
Sarah, a college student, used the toothpaste method to erase several light scratches on her five-year-old Honda Civic: “I was skeptical—but after a wash, rubbing the toothpaste in circles made the scratches fade and the area looked so much better. I finished with a quick wax. It saved me $200 versus a shop quote!”
Quick Tips and Common DIY Pitfalls
- Always test on a small/hidden area first.
- Don’t rush: Repairs done in haste are often patchy or uneven.
- Buffing too aggressively wears away clear coat; gentle, repeated applications are safer.
- Household remedies are best for surface scratches—deeper marks need real paint.
- Never use household cleaners with strong solvents or acids (e.g., vinegar) on car paint; they may damage finishes.
- Garage or shade is best: Direct sunlight can cause products to dry too quickly, leaving haze.
- Gloves, masks, and eye protection are smart (especially with abrasive or chemical products).
- Dispose of used towels/compound pads responsibly.
Safety Warnings
DIY scratch repair involves mild abrasives and sometimes chemicals—proper safety is essential.
- Use gloves: Prevents skin irritation from compounds or paint.
- Ensure good ventilation: Work outdoors or with windows open if using strong products.
- Goggles recommended when sanding or buffing at high speed.
- Keep all polishes and compounds out of children’s reach.
- Avoid breathing or ingesting compound dust.
- For electric buffers: Check cord and tool condition before use.
- For further safety guidelines, consult official sources such as LNI.
Frequently Asked Questions
Q: Will these methods ruin my car’s paint?
Applied correctly, they are safe for clear coats and painted surfaces. Overusing abrasives, skipping prep, or using the wrong compound can cause dullness.
Q: Are household remedies a permanent cure?
They are highly effective for surface marks, but deeper scratches need automotive touch-up paint or professional work for full longevity.
Q: Can these fixes be used on any car color?
Yes, for clear coat and non-metal-penetrating scratches. For visible color damage, use the exact match touch-up paint to avoid mismatches.
Q: Will these methods affect resale value?
Well-executed minor repairs can improve resale appeal. If in doubt, consult or have the repair professionally inspected.
Q: How long should I wait before waxing or washing the area after a repair?
At least 24 hours after using paint or new clear coat, to allow curing (see Vevor).
Conclusion
Learning how to remove car scratch at home can save you time, protect your investment, and boost your confidence as a hands-on car owner. Whether it’s the toothpaste hack, dedicated scratch remover kits, or careful rubbing compound techniques, there’s an effective fix for nearly every common scratch. By following this step-by-step DIY guide—and understanding the crucial difference between shallow and deep scratches—you can achieve safe, satisfying results and keep your car looking sharp years longer.
Remember: Proper prep, choosing the right fix for your scratch type, following through to polish and sealant, and knowing when to seek professional help are the keys to long-term success. For the latest scratch repair costs and more DIY tips, visit TurboKar. Happy motoring!


